Showing posts with label Bushcraft. Show all posts

Saturday, 10 June 2017

How to make a wood whistle


Take my word for it, carving a whistle from elder is an empowering activity, one that traces the handiwork of our ancestors and resounds in you long after the note has disappeared into the autumn air. And it’s dead simple. All you need is a penknife and a pair of eyes.

Elder is extremely common and easy to identify. Look around roadside verges, parks, woods, wastelands and railway lines for a bush-like, shrubby tree. It has oval-shaped, serrated leaves that grow in opposite pairs and a cracked, corky bark that's grey-brown in colour. The telltale squishy removable pith, which makes it such an ideal whistle making material, runs through its core.


Use a straight branch a bit thicker than your index finger and around ten centimetres long. At this width the pith inside should be at its widest, taking up most of the cross-section. The ratio is important; the tube needs to be hollow enough to create a decent whistle, but not so thin that it splits during its creation. Ideally, the wood will be two or three millimetres thick.

With a penknife, shave away the outer bark and use a sharpened stick to push out the pith in the middle to leave a clear, wooden tube. Now cut the ‘voicing mouth’ two centimetres in from one end by slicing vertically down onto the tube at 90º and meeting this line with a 45º cut. Repeat until the hole resembles a smile that exposes the hollow tube within.

Next, find a round stick that is a touch wider than the end of the whistle and strip away the outer bark until it fits in the tube all the way up to edge of the voicing mouth. Then slice it a flat top with one or two decisive strokes and push it snugly into place. Cover the other end and blow. The flat surface allows the air to hit the voicing mouth cleanly, whereupon it splits to produce the whistle noise.

Regardless of where you source your elder, make a patch of woodland your workshop. Carving is one of the most therapeutic pastimes possible. It is psycho- and physiotherapy, pulling us out of our everyday worries and stresses with gentle focus. The level of concentration required also renders the work delightfully silent labour, leaving our ears open to the sounds of nature all around.

Part of the thrill of British woodland is the stark relief it gives us from our everyday existence, imparting a non-human otherness. Watching the industry of animals in autumn, even one so common as the grey squirrel or ground beetle reminds us of the mind-bogglingly varied contemporaries we share our planet with.

The elder tree has long been thought to be the favourite dwelling place of other, more mystical creatures. Faeries were once said to love the music from flutes made of this wood above all others. After some adjustments, the whistle should work wonderfully, sending sylvan notes through the trees. An elder whistle produces an organic, woody note, closer to that of a birdcall than anything else. Far from scaring away the wildlife, it is as if you’ve found the language of the forest itself.

Making and playing a whistle allows us to bottle something of the joy of the wood even when you return home. For a moment at least, when you take the whistle from a shelf and blow it, the walls and furniture of the room fade away you are back in the trees.


Saturday, 20 May 2017

How to Cook in a Steam Pit


The steam pit is one of those traditional cooking methods that is a fair bit of work, but it's also worth the trouble. If you've been to a real Luau, you have enjoyed the results of a steam pit (or steam mound). These cooking techniques use a hole or mound with hot rocks at the bottom, with layers of dirt, vegetation and food above the hot rocks. The heat of the rocks produces steam from the dirt and vegetation, cooking great tasting food that stays hot for hours until you're ready to eat it.

To start out, a pit of varying depth and width is dug in the dirt, clay or sand. The pit can be as small as one foot deep and one foot wide, or as big as you need if you have enough hot rocks and food to fill it. I typically dig two feet wide and a foot and a half deep to cook for a few people, but I once dug a steam pit as big as a grave to cook 72 fish for a large group.

Next, you'll need rocks and lots of firewood. Select suitable rocks from a high, dry location. These rocks are placed in the bottom of the pit to see how many it will take and where the stones fit best. You have a choice now of leaving the stones in the pit and building the fire on top of them, or taking the rocks out of the pit and placing them in a big fire. Either way, the stones should be heated for two hours.

If you heat the rocks in the pit, you must scoop the remaining wood, charcoal, coals and ash out of the pit when the rocks are hot enough. The wood, ash and charcoal will give the food an unpleasant "wet smoked" flavour otherwise. If you heat the rocks outside of the pit, you can use a shovel to scoop them up and move them into the pit. You can also just roll them or slide them with a stout pole.

Once the pit has the hot rocks in it, cover them with an inch or two of dirt or sand. Then place 6 to 8 inches of vegetation over the dirt. Next, put your food in a single layer, with the things that need the most cooking in the centre and the other foods around the edges. Leave a few inches of space between the foods and the wall of the pit for even cooking. Then cover your food with another 6 to 8 inches of vegetation.

Once you have your food in the pit between layers of vegetation, you can cover the pit with the dirt from digging the hole. A layer of bark, mats or cloth could go on before the dirt to make dirt removal easier when the cooking is done. When the final dirt goes on, your work is done. Just come back three or more hours later, dig up your food, and enjoy.

Tips for working with a Steam Pit:


  • A "rock kettle" can make a good steam pit, but you'll still have to dig up some dirt to cover it.

  • Work quickly to get your vegetation and food in the pit so that your hot rocks don't cool off too much before you seal the pit.

  •  A few cups of water poured over the top layer of green vegetation will generate more steam and conduct heat to your food more efficiently.

  • Use enough dirt on top so that no steam is seen escaping.

  • In freezing cold weather, you may need to build a fire on top of the pit.

  • If the ground is cold and/or very wet, use a thin layer of small or thin rocks before putting in the bigger hot rocks. This will keep the soil from conducting away too much of the rock's heat.

A wide variety of non-toxic vegetation can be used in Steam Pits. Here is a partial list of materials that are good -- and some materials to avoid.

Good Steam Pit Vegetation:


  • Grasses, sedges, cordgrass, cattail leaves, reeds and rushes edible weeds like amaranth, lamb's quarters

  • Leaves and leafy branches of mild smelling and tasting trees like maples and willows

  • Good tasting and smelling leaves of sassafras and spicebush

  • Seaweed (but watch out for sea lice and other little sea creatures)

  • White Pine needles (and most other pines, except for ponderosa and loblolly pines which may be toxic)

Toxic or Foul Tasting Vegetation:


  • Oak, walnut and tulip poplar leaves -- Foul tasting

  • Buckeye and horse chestnut tree leaves -- Toxic

  • Cherry tree leaves -- Become deadly poison as they wilt

  • Pokeweed leaves and stalks -- Toxic to poisonous

  • Rhododendron, laurel and most evergreen shrubs -- Toxic to poisonous

  • Iris leaves and jimsonweed leaves -- Toxic

  • Some ferns -- Toxic

  • Any unknown herbs, weeds, wildflowers or shrubs -- Potentially toxic

Please tell let me know in the comments if you have done this technique, or just enjoyed the results of this great outdoor cooking method.

Monday, 27 February 2017

5 Essential Bushcraft Knife Skills to Learn

The best bushcraft knife in the World will not guarantee it's going to be useful for you in the wilderness.  In order for it to be useful when it really counts,  you need to learn and practice some basic bushcraft knife skills.  In this article, I'm going to show you 5 knife skills that you can start working on today.


The great thing about learning to use your bushcraft knife is that you can do this in your backyard.  Thpractisinging is fun and over time you will become proficient with your bush knife.  Then if the need ever arises in the wilderness or a survival situation you will be prepared and know that you have chosen the right knife for the task.

Carving


Carving is probably going to be one main uses for your bushcraft knife.   This will allow you to make useful tools like spoons, bowls, and fire boards.  Carving is also something that is fun to practice at home and will greatly increase your overall control with your bushcraft knife.

You are also going to find out how well your bushcraft knife does at some of the smaller tasks.  Many people want a thick long blade for their main knife but those knives can suffer sometimes when it comes to the finer tasks like carving.

There are many knives made especially for carving like hook knives.  And while I use and suggest you have these knives as well, I also suggest you learn to do carving with your main bushcraft knife.  That way if the situation ever arises where it's the only knife on your person you know what to expect from that knife and your bushcraft knife skill set.

Batoning


Okay, I'm going to start right off by saying that batoning is controversial among bushcrafters.  Many believe that you shouldn't use your bushcraft knife for batoning, myself included.  I prefer to carry an axe, saw or hatchet to perform wood tasks around the camp.

However, I still feel like it's a skill you should learn and practice because you never know when the situation arises that you don't have an axe or hatchet.  It's better to be prepared and know whether or not your knife can handle the task of batoning when you are at home in your backyard than when you really need it.

Most of your batoning will be done in the form of splitting wood.  You will need to select a bushcraft knife that is a few inches longer than the wood you are trying to split. 

Place the wood on a solid surface standing on end.  Then place your knife on top of that.  Strike out towards the exposed tip of the knife with a small hard piece of wood (the baton).  Keep batoning the knife until you split the wood. 

Try not to hit directly on the tip to protect the knife if possible.  A thicker blade will usually give you better results when batoning and is less like to take damage.  Also, it's important to have a full tang knife blade when doing this to avoid breaking the knife from the handle or scales.

Besides splitting wood, you can also baton with your knife when truncating wood.  This is when you are cutting small diameter wood into shorter pieces.  The procedure is basically the same as splitting wood but instead of placing the wood on its end you are placing it on its side.

Finally, you can baton with your knife to make deeper notches in your wood (similar to a wood chisel) or to also cut off small branches.   Even though not everyone agrees on using their knife for batoning I would still recommend learning the skill and to make sure you have a knife that can hold up to this bushcraft knife skill.

Feather Sticks


Making feather sticks is an important bushcraft skill to learn with your knife.   Feather sticks will allow you to start a fire when wood is damp and other methods might fail.  They will provide quick and intense heat for your fire at the beginning.  Another thing is that by making feather sticks you will improve your other bushcraft knife skills.

A good method is using a light touch to make light slices in the wood.  This will give you nice curls in your feather stick.  By practising this skill you will see how well your knife's blade bevel and sharpness does with this common bushcraft tasks.

Practice this skill in conjunction with your carving and fire starting skill below.  In no time you will be able to make some impressive feather sticks and you will be prepared to light a fire in adverse conditions.

Fire Starting


Making a fire is paramount in survival situations or just general bushcrafting.  It's important to know if your knife can handle this task.  It's also easy to practice at home in your backyard.

One technique to practice is whether or not the spine of your bushcraft blade can ignite a ferrocerium rod.   The Ferro rod is an easy way to start a fire and can be used thousands of times over. 

In order to do this, you will need a knife with a good 90-degree spine in order to throw a good amount of sparks.  You may need to file the knife spine down to achieve this but it's definitely worth the effort.  A good shower of sparks could be the difference between getting a fire started and sleeping in the cold.

Another fire starting technique to learn is flint and steel.  This technique will only work with your knife if it has a carbon blade.  A stainless steel knife blade won't throw off a spark when struck with a piece of flint.   For this reason, many bushcrafters only use carbon knives.

As with all bushcraft skills, practising fire starting at home and often will make your proficient for those times when you need to get a fire started in the wild.  I also suggest practising not only with dry material but also wet material.  The same applies to cold and warm weather.  It's much easier to gain confidence on starting a fire in wet cold conditions knowing your house is just a few yards away.

Chopping


As if batoning wasn't' controversial enough, I give you chopping.   Many people like to use their bushcraft knife to chop down small trees to make shelters or tools around the camp.  This can be very hard on a knife blade and can loosen handle scales and damage knives.

I'm going to say the same thing here as I did with batoning in that it's a good bushcraft knife skill that you can learn at home.  You will know right away if your knife is good for this type of task. 

The most common method of chopping with a knife is getting out towards the end of the handle with your grip.  Some people only use 3 fingers to grip the handle which makes it easier to give the knife some swinging momentum when striking wood.  Just be careful that you still have a decent grip on the knife for your own safety and the safety of others.

You might also find after using your knife for batoning and chopping that it will work but isn't great for those tasks so you will instead choose to carry and axe, saw or hatchet into the woods.  Again better to learn that now that in a situation where you really need it.


Summary


You will notice that the theme of this article is to practice these skills at home before you are in a situation where your life may depend on it.  Not only will you find out what your bushcraft knife is capable of but you will also improve your own bushcraft skill set. 

An okay bushcraft knife is better in someone's hands with expert skills than a great bushcraft knife is in someone lacking good bushcraft knife skills.  By working at this you will become the former and it will be less stressful when you need these skills.

I hope this helped and please if you have any tips of your own, comment with your thoughts below

Friday, 17 February 2017

How to Sleep Well Outside


This post is aimed primarily at those who are getting started with camping, bushcraft etc. and will probably be old hat to most of you.  I won’t be covering hammock camping because I shall be covering that in a later post.

“The matter of a good portable bed is the most serious problem in outfitting. A man can stand almost any hardship by day, and be none the worse for it, provided he gets a comfortable night’s rest; but without sound sleep, he will soon go to pieces, no matter how gritty he may be.” – Horace Kephart

If you have read Horace Kephart’s “Camping and Woodcraft”, you know that he was a very practical and experience-based outdoorsman. Though some of his equipment and methods may be antiquated (he published his most famous book around a century ago, after all), a great amount of useful information can still be gleaned from his writings today, in my opinion, especially if you are fond of older-style gear and ways as I am. Kephart’s statement about sleeping outdoors is as true today as it has ever been, and my own experiences have mirrored this.

After trying an array of different tents, tarps, wool blankets, sleeping bags, browse beds, foam pads, animal fleeces, bivvy bags and combinations thereof in a variety of temperatures and conditions, I have identified the six conditions which I find must be met in order to sleep well:

1. Make sure you don’t get wet, whether it be from rain, snow, ground moisture or perspiration. Make sure your tarp or natural shelter is large enough (and thick enough, in the case of a natural shelter) to provide effective protection against the rain, which can drive sideways in windy conditions. This isn’t much of an issue if you are in a good fully enclosed tent. A plastic sheet or sufficient natural bedding material will separate you from the dampness of the ground if not in a tent. If your bivvy is not breathable, leave it unzipped part or most of the way to allow moisture from perspiration to escape so that it does not soak your sleeping bag.

2. You should be protected from the wind to prevent cold air from displacing the cocoon of warm air around you. Fully enclosed tents do this automatically, but tarps and natural shelters must be positioned so that their open side does not face the prevailing wind. Having a wind-proof bivvy bag makes positioning of the outer shelter less of an issue.

3. The material around you should be thick and insulative enough to provide insulation from the cold air. The colder the air, the thicker and more insulative the material, whether it be man-made or natural materials. It’s a good idea to use sleeping bags rated to lower temperatures than you think you’ll experience, just to be on the safe side. If using natural materials, wool blankets etc., only field testing will tell you if your insulation is warm enough. A proper heating fire can negate the need for material physically surrounding the body if you go that route.

4. The material underneath you should be thick enough to provide insulation from the cold ground. In many cases, a lot more heat can be lost through the ground than through the air, so ground insulation is one of the most crucial elements to keeping warm and sleeping well. If using spruce boughs in cold weather, for example, make your bed thick (30 cm/12 in thick at least). Some materials compress a lot when you lie on them, so be doubly sure you have enough. I have heard that inflatable sleeping pads are not as effective as good foam pads in cold weather, so that’s something else to be aware of.

5. The material underneath you should be thick enough to compensate for the hardness of the ground and any objects in/on it which would otherwise be uncomfortable to sleep on. Sleeping on the ground is a lot different from sleeping in your bed at night. The ground does not adjust to the contours of your body, so it’s your body that has to do the adjusting, including on rocks, sticks and other such annoyances (which, by the way, should be moved away beforehand anyway, if possible). Sufficiently thick bedding increases comfort immeasurably.

6. There should be a layer of protection against creepy-crawlies, mosquitoes etc. at some level if they are out and about. Whether it’s a tent or tarp’s mosquito netting, a smudge fire or mosquito netting stretched over the face area of the bivvy bag (my favourite method), there must be some physical or chemical barrier which prevents annoying insects from preying on you. Forgetting this crucial element in an area swarming with biting bugs can make any sleep, much less good sleep, very difficult.

These things may seem obvious to many of you, but if you are starting from scratch without much guidance, some of them may not be immediately evident. If it seems that I’m being overly thorough, it’s for the sake of completeness. If it seems I’m not being thorough enough, please share what you know!

After (lots of) trial and error, I’ve arrived at the following setup which works well for me (not saying it’s perfect or ideal, just that it works for me):


Shelter: Simple tarp or multi-configuration floorless tent with a plastic ground sheet (Open shelter allows heat from the fire to enter.)

    Outermost sleep system layer: waterproof bivy bag, unzipped to allow moisture to escape.

    Inside the bivvy bag: one or more sleeping bags on top of climate-appropriate sleeping pads/animal fleeces (Having the sleeping pads inside the bivy prevents me from rolling off them, which I often tend to do.)

    In the Summer: mosquito netting stretched over the area of the bivy bag near my face.

    Here are a few other ideas which can help improve the quality of your night out:


    • Placing a bottle full of warm to hot water in your sleeping bag can help keep up the temperature inside.
    • Keeping a clean bottle with a tight-fitting cap (“pee bottle”) inside your sleeping bag can allow men to answer nature’s call without having to leave their sleeping setup (sorry ladies).
    • Drinking a bit of hot tea before bed can help keep you warm for a while after going to sleep.
    • If you wake up a bit cold, “exercise” inside your sleeping bag (sit-ups etc.) to heat yourself and the bag again.
    • If your clothes are not especially dry, change them before going to bed to avoid bringing extra moisture with you into your sleeping bag.
    • Keep extra socks handy in case your feet get chilly overnight. In colder conditions, long underwear, gloves and a balaclava may also be useful.
    • Don’t set up camp in a recessed area, if you can avoid it because it will likely be colder than surrounding areas.


    Thursday, 9 February 2017

    Can Bushcraft Save The Planet?

    I think there is one particular outdoor activity which might be more effective at helping people learn to care for the environment than any other. Could bushcraft be that activity?   


    Environmental Education (EE) as it exists now is a relatively new field, developed as a result of growing concern that the environment was suffering from pollution, deforestation, desertification etc. as a result of human activity. Although the  Schools Councils 1974 Project Environment discussed the difference between education  ABOUT, FROM and FOR the environment, EE was not addressed on a global scale until the Tbilisi conference in 1977. Organised by UNESCO the conference brought together delegates from  66 nations and representatives from UN agencies and NGOs to participate in the world's first intergovernmental conference on environmental education. 

    As a result of this conference, a declaration was adopted, after a unanimous agreement that EE had an important role in the preservation and improvement of the global environment. This declaration included the following goals; 


    • to foster clear awareness of, and concern about, economic, social, political, and ecological interdependence in urban and rural areas;
    • to provide every person with opportunities to acquire the knowledge, values, attitudes, commitment, and skills needed to protect and improve the environment;
    • to create new patterns of behaviour of individuals, groups, and society as a whole towards the environment.


    Traditionally Outdoor Education has included EE among its aims and objectives, although it could be argued that actually most outdoor education does not directly meet the goals of EE instead focusing on the acquisition of technical skills, team building or confidence. But I think there is one particular outdoor activity which might be more effective at delivering the goals of EE than any other. 


     BUSHCRAFT AS A TOOL IN ENVIRONMENTAL EDUCATION


    Bushcraft is one of those activities which takes place out of doors which I think has the most potential to allow for the delivery or inclusion of EE. In my opinion, the most important aspect of bushcraft is gaining the knowledge that allows you to practice whether as a hobby or a professional instructor. This knowledge is far more important than the kit you own - whether your knife is a £300 and custom made or a cheaper £15 model. 

    Practising bushcraft pulls you right into the environment, it can't be carried out in an artificial setting, it can't be separated from the environment and in fact, you could say it is symbiotic with it. Think of the skills that you use to sustainably harvest resources from the woods, coppicing for example. Coppicing has been carried out in the British Isles for hundreds, if not thousands of years and maintains many broadleaved woodlands which exist in the state we see them in today. 

    If you are coppicing for shelter poles, material for

    construction projects, walking sticks, stocks of firewood to be dried for later in the year or material for carving and whittling you are using your knowledge of when to cut to encourage regrowth, how to cut to prevent or reduce the chance of disease, which species are suitable for coppicing and for your desired use. Also, whether or not you realise it or not, you are actually creating a niche habitat in a woodland.  You are demonstrating a greater understanding of your local environment than most people (as long as you are carrying out your bushcrafting responsibly and sensitively in places where you have permission). But I also feel strongly that although involvement with the natural environment, outdoors, can promote an appreciation of the environment, this is by no means automatic nor, if it does occur, does it always extend to the environment as a whole but possibly only to a very limited area where a person feels they have responsibility or a vested interest. So as a bushcrafter do you only have a vested interest in that small piece of the 'environment' where you have permission to practice? 

    I would argue that as bushcraft is such a broad topic which draws on the knowledge and skills of first nations and traditional skills from all over the globe, bushcrafters are in an excellent position to broaden our own minds and the minds of those we teach as to issues beyond our normal stomping grounds. In fact, the following quote sums up a lot of my reasoning as to why bushcraft could be so valuable in EE;

    “Within the context of their own lifestyles indigenous peoples have been practising ‘environmental education’ for thousands of years.” (S. Sterling, Sustainable Education,  2001).

    So much of what we practice is based on these skills because quite simply indigenous people relied ENTIRELY on their environment for their subsistence and over-hunting, over-fishing, pollution of water sources, the decimation of woodlands or other habitats due to fire, natural disaster or exploitation could literally cost them their lives. However they chose to teach the next generation to respect their environment, it was effective. The Tukano Indians of South America believed in a 'Master of Animals' who would punish them for over hunting. The Australian Aboriginal cultures tell stories of 'Dreamtime' or the creation which teaches lessons about how to live. Every other culture has its unique traditions and beliefs which govern how they live and how they interact with their environments. As bushcrafters, we have a responsibility, and a better opportunity than many to deliver engaging activities outdoors which bring people into direct contact with the environment on a level which means they have to think about how to care for that environment. 

    We need to rekindle that indigenous knowledge and pass it on as there aren’t many people now who seek as close a relationship with the natural environment as we enjoy.      


    Monday, 9 January 2017

    The Paradisiacal Pine Resin


    Pine resin or pitch is the secretion from pine trees caused by cuts in the tree trunk or from broken limbs. The trees secrete the resin to seal up any cuts or damage to the tree. If you find yourself lost or stranded in a wilderness environment one of the best-case scenarios is that there are pine trees in the area. Pine resin exposed to the air will harden/crystallise but it can be softened for use by heating.


    Medical Uses for Pine Resin


    Treating wounds


    A traditional use for pine resin has been as an external treatment for burns and sores. A long-term study was done by Russian scientists and published in the April 2002 issue of the “Byulleten’ Eksperimental’noi Biologii I Meditsiny” found that pine resin, as a main active ingredient in Biopin ointment, inhibited antibodies found in bodily fluids but aided healing and prevented infection by boosting cell immunity. The ointment did not cause irritation or allergic reactions.

    Rheumatism

    Native Americans have used pine resin to treat rheumatism because of its anti-inflammatory properties. The resin acts to remove the joint inflammation caused by rheumatism, which helps to restore movement and to alleviate pain. The Costanoan Indians gained these benefits by chewing on the gum-like resin.

    Other Uses for Pine Resin


    During the American Civil War, the Confederate surgeon Francis Porter used pine resin as a stimulant, diuretic, and laxative. In China,  the resin from a particular pine tree is used to treat abscesses. Resin from the spruce tree was used by colonial Americans as a cold and cough remedy, as well as straight from the tree as a cancer treatment. Physicians in colonial America also recommended tar water, or ground pine resin mixed with water, as a remedy for ulcers, smallpox, and syphilis. These are traditional holistic medicinal uses for pine resin that have not, as of yet, been confirmed by modern science as effective, but that does not mean there is no basis for some of the claims made about resin’s anti-inflammatory properties.

    This may be so but the fact is that the resin once applied to a cut or scrape will inhibit the growth of bacteria because it denies the bacteria the moisture it needs to survive. Because of its very sticky nature, pine resin can be applied directly to a bleeding cut to help stem the flow of blood and close the wound up similar to stitching. Some survival experts use pine pitch in place of super glue to seal up cuts. Leave the resin in place, and reapply as needed. There have been reported cases where serious bleeding wounds have been stemmed using pine resin.

    Waterproofing Shoes and Other Materials

    Pine resin is essentially impervious to water so it can be used to treat objects to make them resistant to the damages caused by moisture. It can be used to seal seams, repair breaks/holes in boats, shoes and structures to prevent water leaks. In a survival situation, you may have to repair holes in boots, shoes and shelters. You can also use the resin to waterproof the lower half of your hiking shoes or boots.

    The resin must be heated to liquid form so it can be applied to the material. Avoid heating the resin in a shallow container over an open flame because the flames from the fire can easily ignite the resin, which is highly flammable. Let the fire burn down to coals before heating the pitch. Find a short green stick and repeatedly strike one end to create bristles in the wood, (paintbrush) or chew on the end to break the fibres apart so they can be used to apply the pitch. Use the resin to repair holes in canvas and heavy nylon. Lay the material flat where the rip or seam is exposed. Once the resin is heated to liquid form, apply using the fibrous end of the stick.

    Pine Pitch Glue

    Warm the resin to liquid form and while the resin is heating, crumble some charcoal from the fire as fine as possible. Once the resin is ready, remove it from the heat and stir in the powdered charcoal. The amount of charcoal added should be about one-third as compared to the volume of the pitch. Find a solid stick with a blunt end and dip repeatedly in the mixture to form a ball of pitch on the end. You may need two sticks. This is how the glue is stored until needed. The glue will harden and to use heat until pliable.

    Use the glue to form fishhooks, repair the soles of shoes and use to repair holes in water containers. Use the glue to apply feathers to homemade arrows or allow hardening on the ends of fishing/hunting spears to prevent splintering. Glue in a survival situation has unlimited uses.

    Fire Starting

    Pine resin is flammable and can be used to help start a fire in damp conditions. You may find yourself in a situation where all of the available wood is damp but this does not mean you have to go without a fire.

    Find some hardened pine resin and some pine sticks/branches. Split the sticks and look for streaks of resin in the wood. Use magnesium shavings and a flint bar or you can use a Ferro rod to ignite the pitch. Lay some dried pine needles near the pitch and ignite the pitch. It will burn like a candle long enough to dry the needles out and you can begin adding small pieces of the pine which even if somewhat damp in the middle will burn because of the resin. Once you have, a sizable flame established you could then begin drying out other wood.

    Illumination and Heat

    You can use pine resin to create a lamp. Find a stone with a depression or use a clamshell or any type of shell that can be filled with resin or use a cupped shaped piece of bark. You will also need material for a wick. Use some twisted cloth or even dried moss. Fill the depression with the pitch and lay the wick material on top. You ignite the wick first, which will, in turn, ignite the resin. The resin will burn like a candle and you can feed it more resin to maintain the flame once ignited.

    To use as a heat source place a metal container that has plenty of air holes in it over the ignited pitch. The metal container will absorb the heat and conduct to the surrounding area. This method will not heat a large area but will warm hands and feet in an emergency.

    Considerations

    In most cases, you will find damaged pine trees/broken limbs that have secreted resin. It is recommended that you first look for damaged and fallen limbs before you purposely cut into a pine tree to harvest the resin. If you have to damage the tree do it in a small area on one side of the tree only. Only take as much as you need, you must allow some resin to remain on the tree so it can protect the cut to prevent boring insects from destroying the tree.

    References and Resources


    Tuesday, 3 January 2017

    Plant Lore: Cattail

    The most common cattail (Typha latifolia) that we all recognise is a tall plant often found growing in dense stands in wetland areas, such as marshes and bogs. Various other species of cattail are found worldwide.


    General Characteristics:


    The very recognisable and familiar cattail flowers begin as green spikes (female parts) with loose, dangling hairs containing pollen (male parts) above that. Once fertilised, the female parts turn dark brown and the male parts fall away, leaving a stiff, pointed spike. The leaves are very tall and narrow (grass-like). A tall marsh plant, that grows in dense groups. Early in the year, the top of the head has a slender tail of lighter coloured staminate flowers, the lower dark brown area being tightly packed pistillate flowers. In fact, the flowers are very prolific, one stalk will produce an estimated 220,000 seeds. Even with this number of seeds, cattails colonise by sending up clones from the creeping rhizomes. It has been recorded that a cattail marsh can travel up to 17 feet in a year with prime conditions through the cloning process. Colonisation can happen quickly, as one new seed produces a plant, that new shoot in its first year will send out rhizomes for ten feet in all directions and can produce 100 clones in that first growing season. Cattails can reach heights 3-9 feet.

    There are some poisonous look-alikes that may be mistaken for cattail, but none of these look-alikes possesses the brown seed head.

    Blue Flag (Iris versicolor) and Yellow Flag (Iris pseudoacorus) and other members of the iris family all possess the cattail-like leaves, but none possesses the brown seed head. All members of the Iris family are poisonous. Another look-alike which is not poisonous, but whose leaves look more like cattail than iris is the Sweet Flag (Acorus calumus). Sweet Flag has a very pleasant spicy, sweet aroma when the leaves are bruised. It also does not possess the brown seed head. Neither the irises nor cattail has the sweet, spicy aroma. I have seen large stands of cattails and sweet flag growing side by side. As with all wild edibles, positive identification is essential. If you are not sure, do not eat it.

    The list of uses for this plant is quite extensive and it has been said that if a lost person has found cattails, they have four of the five things they need to survive: Water, food, shelter and a source of fuel for heat—the dry old stalks. The one item missing is companionship. Some of the plant's major uses are:


    Food source


    The stems a few inches above the soil line in early summer are young and tender and can be peeled and eaten raw or boiled. The roots are great as well, simply pull the lower stalks until the roots break free, peel and eat raw or boil. The cattail will also develop flower heads that can be eaten by roasting as if you would an ear of corn. By mid to late summer, pollen will collect on the heads and it is easily shaken loose into any container to be used like flour to make bread, pancakes and can be used for thickeners in gravies and sauces. The roots in late fall and early winter can be mashed and soaked in water to release the starch. The starch will settle on the bottom and will resemble wet flour. Drain the water off and make bread, by adding a little pollen or add to clean water to make soup. Cattails are an ideal survival food because they are easily recognisable and grow practically anywhere there is water.

    Shelter Material


    The green leaves can be cut and woven together into shingle like squares for covering a shelter roof. The material will provide protection from the rain, snow and the wind even after it has dried. Weave a sleeping mat by making two long mats. Connect the mats on one side so it can be folded like a sleeping bag. Before folding over fill one side with pine boughs or other material suitable for sleeping on and then fold the empty half over and tie off so the “stuffing” is secured inside. You can fold the mat up and carry it with you if you have to break camp for another location.

    Medicinal Uses


    Cattails are truly a survival plant in the truest sense of the word. They not only provide, food, material for shelters and cordage cattails have medicinal uses as well. To treat burns, scrapes, insect bites and bruises split open a cattail root and “bruise” the exposed portion so it can be used as a poultice that can be secured over the injured area.

    The ash of burnt cattails is said to have antiseptic properties and many people have used the ashes to treat wounds and abrasions. If you look closely at the lower stems you will notice an amber or honey like substance that seeps from the stem, use this secretion to treat small wounds and even toothaches, because it also has antiseptic properties.

    Baskets or Packs


    You can get creative and weave baskets or small packs for carrying food or other items. Cross a number of leaves together and once you have the base the size you want you would fold the pieces up and then weave around the sides to secure the shape. You can easily weave handles or straps into the basket/pack. The basket will become stronger as the cattail leaves dry and harden.

    Cordage


    Peel strips from the leaves and allow them to dry somewhat. Once dried braid at least three strips together to create a line for fishing or use in shelter building.

    As you can see there are many edible and useful parts of the cattail, but now we are going to take a look at the uses for the fluff from the seed head:


    Tinder


    Once shredded from the seed head, the cattail fluff expands into a soft, string-like material – perfect for trapping sparks to create a campfire. Ensure you mix some other material with it as well. However, cattail fluff can burn very quickly, sometimes too quickly!

    Charcloth


    For starting a fire with old-fashioned flint and steel sets, or when using a magnifying glass to intensify the sun’s rays to start a fire, Charcloth is an ideal product to use.

    The steps to create this handy material are quite simple; just pack a metal box with cattail fluff, pierce the box with a nail to make a small hole, then place the box into a campfire for 5 minutes. Use a stick or rod to remove the box from the campfire after some time, then let it cool. Now you have a premium Charcloth!

    Lamp wicks


    The first people to roam America were the Paleoindians, and they had many resourceful ways to survive in the harshest conditions of the New World.

    A simple oil lamp was one way that they lit their caves and rock shelters. A pinch of cattail fluff rising up out of oil made for a fine wick. Try it yourself! If for any reason you don’t have any ‘mammoth’ fat, try a block of lard with a cattail wick.

    Insulation


    You can use cattail fluff inside any item for warmth, such as your hat, some of your clothes, or your footwear. It’s like a plant-based variety of insulation.

    Insect Repellent


    In certain situations, the smoke from the seed head of a smouldering cattail can be a substitute for insect repellent. On a fire safe surface, put the smoking cattail head upwind from your location and the bug repelling smoke will waft over you for 20-30 minutes. You can even leave the seed head attached to the stalk and stick it in the ground as a stand.

    Have you tried using cattail for any projects? If so, please tell me what you did by leaving a comment


    Thursday, 29 December 2016

    Winter Camping, Is It Worth It?

    Your summer calendar may be filled with camping trips, but this is not enough reason to completely close your doors to camping during the chillier months of the year. Believe it or not, winter camping has its own set of perks.


    Photo Credit: Bushcraft and Survival Belgium


    The Advantages of Winter Camping

    If the brisk air and the frosty winter mornings are keeping you from venturing into camping, then you might want to take a look at some of the undeniable advantages of winter camping:


    • Less Crowded Camping Sites: Camping off-season is not everybody’s guilty pleasure. With fewer campers on your trails, you can comfortably pick the most ideal camping spot. However, make sure that you are setting up your tent in areas where landslides and avalanches are least likely.

    • Picturesque Winter Views: Camping during the winter season lets you see the world in a different perspective. Basically, you can expect scenic views as the snow slowly covers leaves and trails. The mountains may look a bit frostier, but you’ll never see picturesque winter views during the early months of the year.

    • Bid Goodbye to Mosquito Bites: Just like many campers, ticks, mosquitoes and other bugs go dormant during the winter season.

    • Rewarding Camping Experience: If winter camping has never been a part of your bucket list, you should try it at least once. Offering you a closer encounter with nature, winter hiking is a challenging, yet fulfilling experience.


    Despite its plusses, winter camping is not for everybody. If you think you have the experience, knowledge and skills to go camping during the last few months of the year, go ahead and dive into a new adventure.

    Just remember, there is no substitute for mental and physical preparation. Before scheduling a camping trip, research on some winter camping dos and don'ts so you would know what to do in case the going gets tough.

    Lyme Disease Prevention


    Anyone who spends time outside or hikes, works, plays in wooded or grassy places is at risk of contact with infected ticks which are the main vectors (or transmitters) of Lyme disease. The risk is especially high during warm summer days. But, luckily, there are many tips that you can take to protect against tick


    What is Lyme disease and how does the infection occur?


    Lyme disease, also known as Lyme borreliosis, is an infectious disease caused by bacteria of the Borrelia type. The disease has been found on every continent except Antarctica.
    The disease is primarily transmitted by Ixodes ticks: Ixodes ricinus (the sheep tick or castor bean tick) in Europe, Ixodes scapularis (The black-legged tick or deer tick) on the East Coast of the United States, Ixodes pacificus (Black-legged tick) on the West Coast of the USA and Ixodes persulcatus (the taiga tick) in China.


    Tick has several developmental stages, but most people get Lyme from the bite of the nymphal, or immature form of the tick. Since they are so tiny and their bite is painless, so many people do not even realise they have been bitten and they don’t notice that the tick is attached to their body. The longer it stays attached, the more likely it will transmit the Lyme into your bloodstream. Usually, the infected tick must be attached for 36 to 48 hours before the bacteria can spread to the human body. Lyme disease is treatable, but it can cause serious health problems if you wait too long to get treatment.
    Signs and Symptoms
    The another name for Lyme is “The Great Imitator,” because its symptoms mimic many other diseases. It can produce a range of symptoms, depending on the stage of infection. Not all patients with Lyme disease have all symptoms. Also, many of the symptoms are not specific to Lyme disease but can occur with other diseases, as well. The incubation period is usually one to two weeks.
    Early signs and symptoms, according to Center for Disease Control and Prevention (CDC) are rash, fever, chills, headache, fatigue, muscle and joint aches, and swollen lymph nodes. These are the symptoms of the infection that have not yet spread throughout the body. The classic sign of local infection is a circular outwardly expanding red rash. It also may be warm but is generally painless.
    Later signs include severe headaches and neck stiffness, rashes on the other areas of the body, Arthritis with severe joint pain and swelling, irregular heart beats or heart palpitations, nerve pain, dizziness, shortness of breath and even the problem with short-term memory.
    If you notice any of these symptoms and have had a tick bite, live in an area known for Lyme disease, or have recently travelled to an area where Lyme disease occurs, seek medical attention immediately.
    How to remove a tick
    CDC recommends following these steps to remove the tick attached to your body:
    1. Use fine-tipped tweezers to grasp the tick as close to the skin’s surface as possible.
    2. Pull upward with steady, even pressure. Don’t twist the tick since it can cause the mouth-parts to break off and remain in the skin. If this happens, remove the mouth-parts with tweezers. If you are unable to remove the mouth easily with clean tweezers, leave it alone and let the skin heal.
    3. After removing the tick, it is important to clean the bite area and your hands with rubbing alcohol, an iodine scrub, or soap and water.
    4. Dispose of a live tick by submersing it in alcohol, placing it in a sealed bag/container, wrapping it tightly in tape, or flushing it down the toilet. Never crush a tick with your fingers.


    Tips to stay safe from infected ticks and Lyme disease
    • Perform a full body check every evening after being outdoors (even in your own garden). Ticks often hide in body folds, like underarms, in/around ears, inside the belly button, back of the knees, between the legs.
    • To avoid ticks, walk in the centre of trails and avoid walking through tall bushes or other vegetation.
    • Use repellent on clothing and tent floor. Use a repellent with DEET (on skin or clothing) or permethrin (on clothing and gear). Apply it to the skin and you’ll have a protection up to several hours.
    • Wear light-colored clothing sp the tick is more easily visible before it attaches itself.
    • Try to keep the body covered by wearing long-sleeved shirt and pants. (Possibly tucked into socks or boots), a hat and insect shields.
    • Check your clothing and pets for ticks because they may carry ticks into the house. If you find them on your clothes place it into a dryer on high heat to kill ticks.
    • Always carry tweezers. Use tweezers to grip the head and remove the tick.


    Saturday, 17 December 2016

    Tree Lore: Holly

    Botanical painting of Holly

    LEARN 9 BUSHCRAFT USES OF HOLLY


    According to the medieval Brehon laws of Ireland, if someone was caught illegally felling a holly tree the culprit was obliged to owe the landowner the hefty fee of two milking cows.

    During that time period trees were categorised into four divisions according to their cultural and practical value. The highest value division was the Airig Fedo division.

    Airig Fedo is a Gaelic phrase meaning Nobles of the Woods.

    Only 7 native trees were bestowed the lofty status of a noble: oak, hazel, yew, ash, pine, apple and holly (1).

    What made holly a valuable tree was its tough, heavy wood which was favoured, during those times, for making spears and chariot axles – both understandably much-valued items during the periods of strife that was widespread during that era.

    Holly was also an essential fodder crop. The nutritious, evergreen leaves of holly were the perfect fodder crop for livestock during the lean months of winter.

    Holly leaves were an important winter fodder in parts of Ireland as recently as the 1950’s, until replaced by hay as the primary winter fodder (2).

    Identification
    of
    Holly, Ilex aquifolium


    Alternative names:    Hulver Bush, Holm, Holy tree, Christ’s Thorn, European Holly, Common Holly, English Holly.


    Family: Aquifoliaceae

    Distribution:   Generally common in Ireland and Britain, often found as an understory tree of native, deciduous woodlands or part of a hedgerow system. Found throughout most of central and south Europe.


    KEY IDENTIFICATION FEATURE OF HOLLY…
    SPINY, LEATHERY LEAVES!


    Glossy, dark green, upper leaf surface. Under the surface of the leaf is light green.


    Holly is evergreen. Its characteristic, spiny leaves are present throughout the year


    Flowers: Fragrant, white, four-petalled & small (6-10mm). Unusually, the petals have a leathery, waxy texture. The flowers originate from the leaf axils (the junction between the leaf stem (petiole) and the twig it's attached to).


    The distinctive, 4-petalled white flower of holly


    Buds: Small (2-3mm long), green, hairless and pointed.

    Bark: In its youth, holly bark is smooth and usually of a light grey colour. With age, the bark becomes progressively rougher. There can also be a number of small protuberances protruding from mature bark.

    The bark of mature holly is noticeably rougher in texture and appearance and can have a number of small bumps on the bark

    Profile: Holly is generally a small tree, and slow growing. The overall shape is often domed or conical. Often, holly trees will refuse to take on a neat shape and have a somewhat scraggly, dishevelled appearance.


    The overall appearance of holly trees can be a little on the unruly side

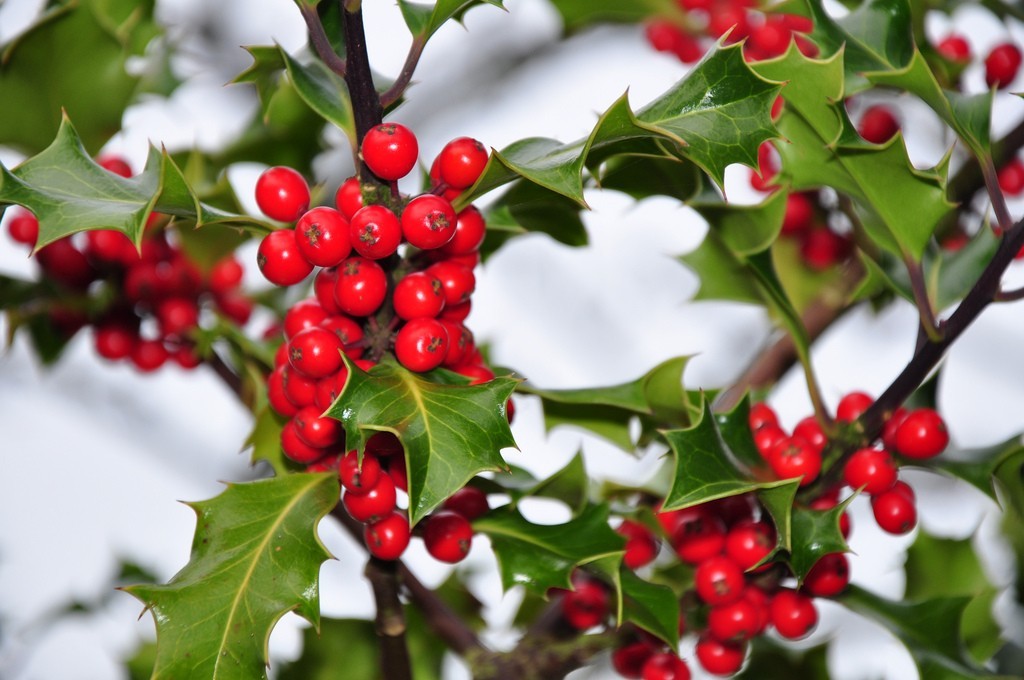
    Berries: Female holly trees produce clusters of striking, coral-red berries.

    Poisonous to humans but edible for a lot of wildlife.

    Important food item for winter-visiting, migratory thrush species such as the fieldfare, Trudus pilaris, and redwing, Turdus iliacus. Often, mixed flocks of both species can be seen descending on berry-laden hollies during winter – gobbling away to their heart's content.

    The hard berries of holly soften after exposure to frost and provide much needed, cold-weather sustenance for not only for bird species but also some mammal species, such as the red squirrel and pine marten (very partial to berries, despite its fearsome reputation).


    The striking red berries of holly – an important winter survival food for quite a few mammal and bird species

    9 BUSHCRAFT USES OF HOLLY

    The holly is a great bushcraft tree. Below is a list of 9 bushcraft uses of the holly tree.


    1.   KINDLING
    2.   FUEL
    3.   CARVING WOOD
    4.   FEATHER STICKS
    5.   FLAMMABLE BARK
    6.   BOW-DRILL LUBRICANT
    7.   LONG, STRAIGHT BRANCHES
    8.   NATURAL SHELTER
    9.   LEAF LAYER OF DEBRIS HUT


    1. KINDLING
    The branches of living holly tree possess an unusually high number of attached, dead, thin, long and flammable twigs.

    They are often of ideal length, dryness and thinness for the small twig fire, and just as importantly – it’s possible to collect many dead, holly twigs in a short period of time – important if you need to get a fire going quickly.

    Holly trees have an abundance of thin, long, dry dead twigs attached to living branches – they are exceptionally good kindling 


    2. FUEL
    The dead wood of holly burns hot and long as a fuel.

    A lot of dead wood from holly trees has, for some reason, many small holes running throughout the wood which greatly increases its combustibility (more oxygen). The holes could be the remnant burrows of wood-boring insect larvae.

    Many holly trees have large dead limbs still attached to the living tree. These sizable limbs are often vertical, or near vertical, and easy to dislodge (all they often require is a sharp shove to dislodge). The more vertically aligned deadwood is, the drier it usually is (sheds rain better).

    Large, dead holly branches can be easily broken into shorter lengths by bashing the dead branches over something hard e.g. a large rock/boulder. No sawing or axe sectioning is generally required. However, be careful when forcefully breaking large branches as they can jar the hands when struck or break upwards – hitting an individual in the face.


    3. CARVING WOOD
    Dense, smooth and often of clean, ivory-white colour – the wood is exceptionally attractive.

    Although the wood can be hard to carve, it holds a hard-wearing edge and is an ideal choice for robust carving projects, be warned – the wood can be prone to splitting at the ends when dried too quickly.

    It’s important that holly wood has been dried (seasoned) gradually, especially if you are planning on using the wood for important carving projects, such as a knife handle.


    4. FEATHER STICKS
    Admittedly, holly is not a first choice wood for feather sticks.

    It’s hard to acquire sufficient lengths of holly wood that is knot-free. Also, dead holly tends not to yield long, multiple-curled shavings when carved.

    However, it’s possible to make small feather sticks from holly – it’s just that more of them are required to make a large enough mass of curls for a sure-thing fire in damp conditions – anything between 4-8 feather sticks, even more.

    How many feather sticks is exactly needed depends on your feather-stick making skills and the quality of the holly wood that you are using (make sure to make plenty of thin splints as well!).

    So, why bother making inferior feather sticks from Holly? There are deciduous woodlands that have a vigorous understory of holly with few other tree species present. In those instances, holly can be the best feather stick choice and since bushcraft is very much about expanding our skill sets for all eventualities…

    5. FLAMMABLE BARK
    Birch is not the only deciduous tree in town that has flammable bark.

    Mature holly trees, especially standing, dead holly trees, sometimes shed a peeling bark that is flammable – certainly not as flammable as birch bark, nor does holly bark come off in the same copious quantities as birch bark – but off it comes, and it's flammable – and can give you a fire-lighting edge when you need it.


    6. BOW DRILL LUBRICANT
    The leaves of holly, when crushed, are fantastically waxy.

    Holly leaves make a first-class lubricant for the handheld (bearing block) of the bow drill.

    Personally, I admire the way my drill spins in the handhold when lubricated with holly leaves. Makes drilling a lot easier which enables me to spin my drill as fast as possible with less effort.

    Seriously, I’ve found holly leaves to be a great bow drill lubricant and so will you?

    Occasionally, I will put a few holly leaves in my backpack when the opportunity presents itself – just in case I decide to make a bow-drill fire in a location where holly trees are absent.


    7. STRAIGHT, STRONG BRANCHES
    Not a whole lot of deciduous tree species naturally produce straight branches.

    Of course, some tree species when coppiced, such as hazel and sweet chestnut, produce an abundance of straight branches. Un-coppiced holly is generous in its gift of straight branches.

    Strong, long and tough – the straight branches that grow as secondary growth on the larger branches or a basal growth at the bottom of the main tree trunk have multiple, potential uses – shelter construction, throwing sticks, batons, digging sticks, arrows, walking staffs, spring traps and pot suspension are just a few applications for the straight, tough and long branches of holly.

    It’s not hard to see why, historically, holly branches were once used for making spears and chariot axles.

    Straight and strong branches growing from the base of a holly tree. Holly branches are also quite elastic 

    8. SHELTER
    An unusual application of holly. The dense, evergreen canopy of holly can provide a discreet, well-sheltered site.

    Many holly trees have a canopy that reaches close to or to, the ground. Such trees are great for wildlife observation, or as a sheltered spot for sitting out inclement weather (while getting a quick brew on) or as a discreet camping site.

    Just be mindful of the spiny leaf litter of hollies – some form of barrier is required to comfortably sit or lie under a holly tree. Alternatively – clear away the holly leaf litter from under the tree.

    Bonus: the thick evergreen canopy of holly tends to disperse campfire smoke very well – important if you want to maintain a low-impact presence in an area.


    9. LEAF LAYER OF DEBRIS HUT
    The thick, leathery leaves of holly provide great insulation for natural shelters such as the leaf-debris hut and the leaf-debris group shelter.

    Rain tends to be shed off more efficiently from a shelter cocooned in holly leaves. Gathering the spiny, holly leaves can be challenging – usually, some form of hand protection is required.

    However, where there are holly leaves there are obviously – holly trees, so making a nice, natural shelter under a benevolent holly canopy can provide additional weather-buffing.


    The dense canopy of holly trees can provide a surprising amount of shelter

    THINK FOR YOURSELF


    WHY YOU SHOULD CONDUCT YOUR OWN BUSHCRAFT EXPERIMENTS


    The above list of 9 bushcraft uses of holly is certainly not a comprehensive list of all bushcraft uses associated with holly.

    It’s my hope that you create your own list of bushcraft uses for the holly tree – through your own bushcraft experiments.

    Of course, it’s important to avail of training courses, advice, research and experience as regards progressing your bushcraft knowledge, skills and experience.

    It’s also vitally important that you draw your own conclusions from your own observations, deductive reasoning and experiments.

    A key asset of any serious bushcrafter that actually spends a lot of time outdoors is fostering your own ingenuity – that you strive to acquire the confidence and get-go attitude to create and improvise for yourself.

    Learn to trust your own ideas, and test them (as safely as possible). If they fail, so what? At least you tried and learned something about what works and doesn’t work.

    When you succeed you will plant a seed of confidence in yourself to trust your own observations.

    This is important.

    Books, training courses, other sources of valid bushcraft information etc. will only get you so far.

    Wild places are variable at the best of times – they demand a flexible mindset to overcome some of the inevitable challenges that wild places will occasionally throw at you.

    This is especially important if you plan on visiting, alone or with a group, wilderness areas. It’s also important in survival scenarios.

    Besides, figuring things out for yourself can be surprisingly satisfying – even fun. Whether it's experimenting with unusual bushcraft applications of holly, or modifying a natural shelter design – it's important that you occasionally flex and strengthen your ability to try things differently – on your own terms.

    The art of applying competent, safe and novel ideas in a bushcraft setting, is a practice that improves with regular application. I will explore this theme more fully in a future article, so keep tuned . For now, I hope you enjoy becoming (re)acquainted with a fantastic bushcraft tree – holly.


    HELP PRESERVE THE HOLLY


    Finally, I’m going to briefly step onto my environmental soap box and share a message I think is important.

    In many places, there has been a serious decline in female holly trees due to the custom of cutting down berry-laden holly branches for Christmas.

    Often there is a disproportionate ratio of male to female holly trees with male trees greatly outnumbering female holly trees because of a local decimation of female holly trees.

    If you are considering collecting holly berries, please refrain from doing so. Wild berries serve a much more vital function in nature – certainly more important than human decoration. The true Bushcrafter cares about nature and tries, when possible, to enhance a woodland rather than unnecessarily deplete its natural resources.

    As a holly substitute consider the foliage of invasive tree species, such as cherry laurel, Prunus laurocerasus, and rhododendron, Rhododendron ponticum. Although both species lack red berries, the foliage is certainly pretty enough for Christmas wreaths. You will also be helping to control an invasive species.

    References:  

    (1), (2) & (3):  Trees of Ireland, Native and Naturalized, Nelson, E. Charles and Wendy F. Walsh.