Showing posts with label Tutorial. Show all posts

Saturday, 10 June 2017

How to make a wood whistle


Take my word for it, carving a whistle from elder is an empowering activity, one that traces the handiwork of our ancestors and resounds in you long after the note has disappeared into the autumn air. And it’s dead simple. All you need is a penknife and a pair of eyes.

Elder is extremely common and easy to identify. Look around roadside verges, parks, woods, wastelands and railway lines for a bush-like, shrubby tree. It has oval-shaped, serrated leaves that grow in opposite pairs and a cracked, corky bark that's grey-brown in colour. The telltale squishy removable pith, which makes it such an ideal whistle making material, runs through its core.


Use a straight branch a bit thicker than your index finger and around ten centimetres long. At this width the pith inside should be at its widest, taking up most of the cross-section. The ratio is important; the tube needs to be hollow enough to create a decent whistle, but not so thin that it splits during its creation. Ideally, the wood will be two or three millimetres thick.

With a penknife, shave away the outer bark and use a sharpened stick to push out the pith in the middle to leave a clear, wooden tube. Now cut the ‘voicing mouth’ two centimetres in from one end by slicing vertically down onto the tube at 90º and meeting this line with a 45º cut. Repeat until the hole resembles a smile that exposes the hollow tube within.

Next, find a round stick that is a touch wider than the end of the whistle and strip away the outer bark until it fits in the tube all the way up to edge of the voicing mouth. Then slice it a flat top with one or two decisive strokes and push it snugly into place. Cover the other end and blow. The flat surface allows the air to hit the voicing mouth cleanly, whereupon it splits to produce the whistle noise.

Regardless of where you source your elder, make a patch of woodland your workshop. Carving is one of the most therapeutic pastimes possible. It is psycho- and physiotherapy, pulling us out of our everyday worries and stresses with gentle focus. The level of concentration required also renders the work delightfully silent labour, leaving our ears open to the sounds of nature all around.

Part of the thrill of British woodland is the stark relief it gives us from our everyday existence, imparting a non-human otherness. Watching the industry of animals in autumn, even one so common as the grey squirrel or ground beetle reminds us of the mind-bogglingly varied contemporaries we share our planet with.

The elder tree has long been thought to be the favourite dwelling place of other, more mystical creatures. Faeries were once said to love the music from flutes made of this wood above all others. After some adjustments, the whistle should work wonderfully, sending sylvan notes through the trees. An elder whistle produces an organic, woody note, closer to that of a birdcall than anything else. Far from scaring away the wildlife, it is as if you’ve found the language of the forest itself.

Making and playing a whistle allows us to bottle something of the joy of the wood even when you return home. For a moment at least, when you take the whistle from a shelf and blow it, the walls and furniture of the room fade away you are back in the trees.


Tuesday, 18 April 2017

Guest Post - How to Carry Your Pack


I see many people packing and carrying their bag wrong. Many will see it has in important, but it is very important and why I am able at 49 to carry a large pack for a long distance with next to no issues.

Many will understand that the weight needs to be distributed to the top of the bag and yet important things need to be accessible in case of requirement. This is very true. But not many know why.

Your spine is shaped in such a way as to carry its self and a bearing load in a specific manner. There are synovial joints (liquid filled capsules) between each vertebra all the way down the spine and also muscles between and supporting each spinal section, front side and back (agonist, antagonist and synergist) These synovial joints are filled with synovial fluid which offers lubrication to the joint like the oil in a car ball joint, It protects the articular cartilage from rubbing and wearing away. The lining of the capsule is called the synovial lining which secretes the liquid into the capsule. These capsules are designed to protect the joints in a particular way so as to ensure damage is avoided over time.

If the spinal alignment is out of it's correct and desired line of pressure absorption it will cause the vertebrae to be compressed in the wrong direction. This will also stop the muscles around the spine (the local core muscles) from performing within their range of movement. This over time will cause spine alignment issues and short term back pain and aching during a hike or bag carry.

There is also a connective tissue in the lower back called the thoracolumbar fascia which assists in support and protection of the lower thoracic and lumbar spinal area. This fascia connects lower muscle groups to upper muscle groups and shares the load between the two. A badly carried bag or weight distribution will cause the pivot point to lower and will to a degree bypass the fascia creating too much emphasis into the sacroiliac joint at the centre of the upper hip girdle.

This will create pain to or even in some cases damage to the lower lumbar region and can cause sciatic nerve compression issues. This is why there are some nay options with newer rucksacks. The waist belt is well padded and designed to share weight bearing into the hip girdle rather than just the centre lower back and the shoulder straps allow for good bag alignment down through the spine from the atlas - cervical spine - thoracic - to the lumber and finally into the coccyx area.

Many military designed Bergen's may not have as much support in the lumbar region. This in many cases is because they are designed in the most part to be used with a webbing belt. This allows the Bergen to sit on top of the kidney pouches. These are mainly the older Bergen's as the newer options now have good lumbar support and a generous waste belt. Packing the weight to the top of the bag again ensures the bag removes emphasis from the lumber pivot point and allows the weight to be directed down through the spinal correctly, NOT so the shoulders can take the weight. Too much weight into the cervical spine and shoulder area will cause upper nerve issues and can leave you with nerve impingements and ulnar nerve compression issues which in many cases will show as pain in the shoulder or elbow region due to nerve feedback looping going on... these impingements can be painful and difficult repair.

So DO NOT tighten your shoulder straps up to take the weight of your pack! Allow an even distribution of weight from the shoulder through to the hip girdle.

Some of the old army bags do not allow for a correct distribution without a webbing belt so just ensure you do not overload these bags or carry them for extended distances.


I hope this helps someone?

Please feel free to comment


Monday, 13 March 2017

Make the Most of Your Fire with a Reflecting Wall

Retain more heat from your fire with a fire wall.


The reflecting wall is a great structure to build in semi-permanent camps, and you can even build quick ones at overnight stopping points. These walls block some of the wind (when positioned correctly) and they reflect more of the heat of a fire back toward the user. When used in conjunction with a survival shelter, these walls can create a much more comfortable micro-climate by literally “fencing in” the heat. The wall can be any size or shape, and built from many different materials. Of course, bigger is better. And smoother walls reflect heat better than rough ones. But as long as you have something in place to reflect back lost heat, each stick you burn will make you feel warmer than you would feel without the wall.

Wooden Walls


Any wood can be used for a reflecting wall. If you’d like it to last, cut and stack green wood for your wall. The extra moisture of live wood will limit its flammability. If you’d like the wall to double as a firewood drying rack, you can build it from dead wood that is wet. Just pull out the sticks as they dry, throw them in the fire, and replace them with new wet pieces as you go. You could even use rotten wood to build your wall, if that’s all you have available. The bottom logs or poles that are closest to the fire will dry out and begin to burn first, unless you plaster them with mud, prop flat stones against them, or build the wall far enough away (about 1 yard) that it cannot burn. To build your wall, gather a pile of logs or poles, and drive two stout stakes into the ground. They should be closer together than the length of your shortest log. Set your thickest log on the ground, butted up against the two stakes, then drive in another pair of stakes to pin the log in place. If you plan a low reflecting wall, use stakes about a yard long and drive one foot into the ground. Go for longer stakes is you want a higher wall.

Stone and Mud Walls


For semi-permanent camps (or when stone is your most abundant resource), build a stone wall to bounce back the heat of a fire which would normally be lost. The rocks can be laid “dry” (without any mortar), or you can use mud or clay as a mortar substitute. Mixing dead grass with the mud will add additional strength to the mortar. And if enough mud and grass were available, you could even build your reflecting wall entirely from mud mortar (also known today as “cob”). Make it wider at the base for stability, insert sticks here and there for internal support, smooth the surface for heat reflection, and don’t go too high all at once. Top heavy mud walls tend to flop over.

A Note on Safety


For any rocks you plan to use near a fire, make sure you get your rocks from a dry location. It’s also smart to test them in a campfire (while you’re at a distance) to make sure they don’t explode. NEVER use rocks you collected by a waterway (high rate of explosion). Ever built a fire reflecting wall? Please share your results by leaving a comment.

Saturday, 11 March 2017

How to Build An Emergency Shelter

You could be out in the woods you discover that you are lost. Or perhaps you’re driving along a rural road and your car stalls or gets a flat tyre. Maybe you’re doing some canoeing and it overturns on the lake, forcing you to swim to shore after which you find you’re many miles away from your camp and anyone else.

Regardless of the situation, when you’re stuck outdoors away from civilisation, lodging, or nearby help, you may need to build an emergency shelter. Especially when the weather conditions are cold and wet, or will be soon due to an approaching storm or nightfall, an emergency shelter could literally be a life saver. Here’s how to build a good one that will offer you protection from the elements and hold you over temporarily until you can get to safety or get rescued.

State of mind


Before you get started on a suitable shelter, though, you must be in the right frame of mind. Okay, so you’ve gotten into a sticky situation. The first thing you must resist is the urge to panic or make a hasty decision that makes a bad situation worse. Rather, do this instead:

  • Stop and breathe slowly for a couple of minutes. Accept the situation as it is, and calm yourself. Think clearly and rationally.
  • Assess your surroundings. What kind of environment are you in? Forest? Mountains? Countryside? What’s the weather and temperature like? How much daylight remains?
  • What materials do you have with you? What’s out in the environment that you can use?

Choose a suitable location


Now that you’ve gotten your mental bearings, you can begin planning your shelter. And that first requires picking a location. This is the part where the evaluation you performed earlier comes into play. You’ll want to set up your shelter on dry ground, out of the wind if possible, and near resources such as trees and bushes. If a stream of clean drinking water is nearby, even better.

Assess your materials


The purpose of an emergency shelter isn’t to be all fancy and super comfortable. It’s to get you through the night alive and stave off hypothermia. So don’t worry about having the perfect materials lying around, since all you need is the basics. First, check your own belongings. Do you have a weather parka/poncho? Emergency blanket? Any kind of tarp or plastic bags that can act as covering?

Assess your environment


Now, look at the surrounding environment. Do you have tree branches, boughs, ferns, dead wood, leaves, and bushes around? Is there any “natural” shelter around such as an overhang, rock wall, or cave that can act as part of, or all of the shelter?

Decide what kind of shelter to build


After you’ve evaluated your location, materials, and environment, now it’s time to decide what kind of shelter to build. Keep in mind that it may be cold, dusk may be approaching, or you may be tired, hurt, or ill. So again, nothing fancy, just a quick overnight shelter to protect from the elements. There are dozens of outdoor shelter types you could build ranging from simple to complex, but the one of the quickest to construct is a basic double lean-to or A-frame shelter.


The A-frame shelter, 


For an A-frame, you’ll need to start with a long, thick branch or log about one and a half times your body length. This is the backbone of your shelter. Then, either prop one end against something sturdy like a fallen tree or an upright tree at a low angle and the other end into the ground. Next, place smaller branches along the sides to form “ribs.” The ribs or the walls should be lined up along both sides so that the skeleton of the shelter takes on an “A” shape.

Once the frame of the shelter is erected, you then begin filling in the space with leaves, branches, moss, and ferns. Keep working until you have the entire shelter covered, as you’ll need to keep the wind and rain out, and also trap heat from a fire if you can manage to build one. If you have a tarp, garbage bag, or poncho, you can drape it over the shelter for added insulation. And make the shelter as compact as possible, to help retain body heat. Of course, if there are others with you, then alter the size accordingly.

Try to be comfortable


You’ve got a shelter that should keep the wind, rain, and snow off of you, but it will still be quite cold.  So be sure to insulate your body from the cold ground, which sucks away body heat quickly. Lay down a bed of the same materials you used for the frame right on the ground to lay atop of. Bundle up under an emergency blanket or anything extra on hand, And of course get a fire started if at all possible. Be sure to build the fire close enough to the shelter so that you get some of the radiant heat, but not so close that your shelter catches fire.

When dawn breaks, you might be a bit worse for wear, but you’ll be alive. You feel a sense of accomplishment that you were able to take care of yourself (and others if they’re with you). And you can reassess your situation anew, and determine the best plan to get back to safety.

Monday, 27 February 2017

5 Essential Bushcraft Knife Skills to Learn

The best bushcraft knife in the World will not guarantee it's going to be useful for you in the wilderness.  In order for it to be useful when it really counts,  you need to learn and practice some basic bushcraft knife skills.  In this article, I'm going to show you 5 knife skills that you can start working on today.


The great thing about learning to use your bushcraft knife is that you can do this in your backyard.  Thpractisinging is fun and over time you will become proficient with your bush knife.  Then if the need ever arises in the wilderness or a survival situation you will be prepared and know that you have chosen the right knife for the task.

Carving


Carving is probably going to be one main uses for your bushcraft knife.   This will allow you to make useful tools like spoons, bowls, and fire boards.  Carving is also something that is fun to practice at home and will greatly increase your overall control with your bushcraft knife.

You are also going to find out how well your bushcraft knife does at some of the smaller tasks.  Many people want a thick long blade for their main knife but those knives can suffer sometimes when it comes to the finer tasks like carving.

There are many knives made especially for carving like hook knives.  And while I use and suggest you have these knives as well, I also suggest you learn to do carving with your main bushcraft knife.  That way if the situation ever arises where it's the only knife on your person you know what to expect from that knife and your bushcraft knife skill set.

Batoning


Okay, I'm going to start right off by saying that batoning is controversial among bushcrafters.  Many believe that you shouldn't use your bushcraft knife for batoning, myself included.  I prefer to carry an axe, saw or hatchet to perform wood tasks around the camp.

However, I still feel like it's a skill you should learn and practice because you never know when the situation arises that you don't have an axe or hatchet.  It's better to be prepared and know whether or not your knife can handle the task of batoning when you are at home in your backyard than when you really need it.

Most of your batoning will be done in the form of splitting wood.  You will need to select a bushcraft knife that is a few inches longer than the wood you are trying to split. 

Place the wood on a solid surface standing on end.  Then place your knife on top of that.  Strike out towards the exposed tip of the knife with a small hard piece of wood (the baton).  Keep batoning the knife until you split the wood. 

Try not to hit directly on the tip to protect the knife if possible.  A thicker blade will usually give you better results when batoning and is less like to take damage.  Also, it's important to have a full tang knife blade when doing this to avoid breaking the knife from the handle or scales.

Besides splitting wood, you can also baton with your knife when truncating wood.  This is when you are cutting small diameter wood into shorter pieces.  The procedure is basically the same as splitting wood but instead of placing the wood on its end you are placing it on its side.

Finally, you can baton with your knife to make deeper notches in your wood (similar to a wood chisel) or to also cut off small branches.   Even though not everyone agrees on using their knife for batoning I would still recommend learning the skill and to make sure you have a knife that can hold up to this bushcraft knife skill.

Feather Sticks


Making feather sticks is an important bushcraft skill to learn with your knife.   Feather sticks will allow you to start a fire when wood is damp and other methods might fail.  They will provide quick and intense heat for your fire at the beginning.  Another thing is that by making feather sticks you will improve your other bushcraft knife skills.

A good method is using a light touch to make light slices in the wood.  This will give you nice curls in your feather stick.  By practising this skill you will see how well your knife's blade bevel and sharpness does with this common bushcraft tasks.

Practice this skill in conjunction with your carving and fire starting skill below.  In no time you will be able to make some impressive feather sticks and you will be prepared to light a fire in adverse conditions.

Fire Starting


Making a fire is paramount in survival situations or just general bushcrafting.  It's important to know if your knife can handle this task.  It's also easy to practice at home in your backyard.

One technique to practice is whether or not the spine of your bushcraft blade can ignite a ferrocerium rod.   The Ferro rod is an easy way to start a fire and can be used thousands of times over. 

In order to do this, you will need a knife with a good 90-degree spine in order to throw a good amount of sparks.  You may need to file the knife spine down to achieve this but it's definitely worth the effort.  A good shower of sparks could be the difference between getting a fire started and sleeping in the cold.

Another fire starting technique to learn is flint and steel.  This technique will only work with your knife if it has a carbon blade.  A stainless steel knife blade won't throw off a spark when struck with a piece of flint.   For this reason, many bushcrafters only use carbon knives.

As with all bushcraft skills, practising fire starting at home and often will make your proficient for those times when you need to get a fire started in the wild.  I also suggest practising not only with dry material but also wet material.  The same applies to cold and warm weather.  It's much easier to gain confidence on starting a fire in wet cold conditions knowing your house is just a few yards away.

Chopping


As if batoning wasn't' controversial enough, I give you chopping.   Many people like to use their bushcraft knife to chop down small trees to make shelters or tools around the camp.  This can be very hard on a knife blade and can loosen handle scales and damage knives.

I'm going to say the same thing here as I did with batoning in that it's a good bushcraft knife skill that you can learn at home.  You will know right away if your knife is good for this type of task. 

The most common method of chopping with a knife is getting out towards the end of the handle with your grip.  Some people only use 3 fingers to grip the handle which makes it easier to give the knife some swinging momentum when striking wood.  Just be careful that you still have a decent grip on the knife for your own safety and the safety of others.

You might also find after using your knife for batoning and chopping that it will work but isn't great for those tasks so you will instead choose to carry and axe, saw or hatchet into the woods.  Again better to learn that now that in a situation where you really need it.


Summary


You will notice that the theme of this article is to practice these skills at home before you are in a situation where your life may depend on it.  Not only will you find out what your bushcraft knife is capable of but you will also improve your own bushcraft skill set. 

An okay bushcraft knife is better in someone's hands with expert skills than a great bushcraft knife is in someone lacking good bushcraft knife skills.  By working at this you will become the former and it will be less stressful when you need these skills.

I hope this helped and please if you have any tips of your own, comment with your thoughts below

Saturday, 17 December 2016

Tree Lore: Holly

Botanical painting of Holly

LEARN 9 BUSHCRAFT USES OF HOLLY


According to the medieval Brehon laws of Ireland, if someone was caught illegally felling a holly tree the culprit was obliged to owe the landowner the hefty fee of two milking cows.

During that time period trees were categorised into four divisions according to their cultural and practical value. The highest value division was the Airig Fedo division.

Airig Fedo is a Gaelic phrase meaning Nobles of the Woods.

Only 7 native trees were bestowed the lofty status of a noble: oak, hazel, yew, ash, pine, apple and holly (1).

What made holly a valuable tree was its tough, heavy wood which was favoured, during those times, for making spears and chariot axles – both understandably much-valued items during the periods of strife that was widespread during that era.

Holly was also an essential fodder crop. The nutritious, evergreen leaves of holly were the perfect fodder crop for livestock during the lean months of winter.

Holly leaves were an important winter fodder in parts of Ireland as recently as the 1950’s, until replaced by hay as the primary winter fodder (2).

Identification
of
Holly, Ilex aquifolium


Alternative names:    Hulver Bush, Holm, Holy tree, Christ’s Thorn, European Holly, Common Holly, English Holly.


Family: Aquifoliaceae

Distribution:   Generally common in Ireland and Britain, often found as an understory tree of native, deciduous woodlands or part of a hedgerow system. Found throughout most of central and south Europe.


KEY IDENTIFICATION FEATURE OF HOLLY…
SPINY, LEATHERY LEAVES!


Glossy, dark green, upper leaf surface. Under the surface of the leaf is light green.


Holly is evergreen. Its characteristic, spiny leaves are present throughout the year


Flowers: Fragrant, white, four-petalled & small (6-10mm). Unusually, the petals have a leathery, waxy texture. The flowers originate from the leaf axils (the junction between the leaf stem (petiole) and the twig it's attached to).


The distinctive, 4-petalled white flower of holly


Buds: Small (2-3mm long), green, hairless and pointed.

Bark: In its youth, holly bark is smooth and usually of a light grey colour. With age, the bark becomes progressively rougher. There can also be a number of small protuberances protruding from mature bark.

The bark of mature holly is noticeably rougher in texture and appearance and can have a number of small bumps on the bark

Profile: Holly is generally a small tree, and slow growing. The overall shape is often domed or conical. Often, holly trees will refuse to take on a neat shape and have a somewhat scraggly, dishevelled appearance.


The overall appearance of holly trees can be a little on the unruly side

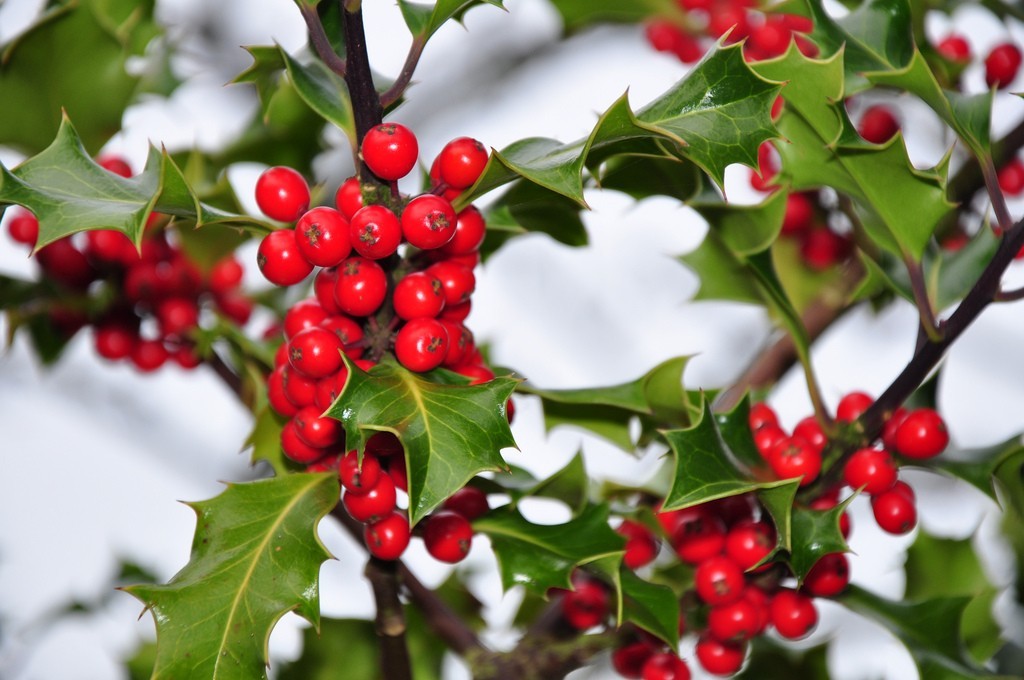
Berries: Female holly trees produce clusters of striking, coral-red berries.

Poisonous to humans but edible for a lot of wildlife.

Important food item for winter-visiting, migratory thrush species such as the fieldfare, Trudus pilaris, and redwing, Turdus iliacus. Often, mixed flocks of both species can be seen descending on berry-laden hollies during winter – gobbling away to their heart's content.

The hard berries of holly soften after exposure to frost and provide much needed, cold-weather sustenance for not only for bird species but also some mammal species, such as the red squirrel and pine marten (very partial to berries, despite its fearsome reputation).


The striking red berries of holly – an important winter survival food for quite a few mammal and bird species

9 BUSHCRAFT USES OF HOLLY

The holly is a great bushcraft tree. Below is a list of 9 bushcraft uses of the holly tree.


1.   KINDLING
2.   FUEL
3.   CARVING WOOD
4.   FEATHER STICKS
5.   FLAMMABLE BARK
6.   BOW-DRILL LUBRICANT
7.   LONG, STRAIGHT BRANCHES
8.   NATURAL SHELTER
9.   LEAF LAYER OF DEBRIS HUT


1. KINDLING
The branches of living holly tree possess an unusually high number of attached, dead, thin, long and flammable twigs.

They are often of ideal length, dryness and thinness for the small twig fire, and just as importantly – it’s possible to collect many dead, holly twigs in a short period of time – important if you need to get a fire going quickly.

Holly trees have an abundance of thin, long, dry dead twigs attached to living branches – they are exceptionally good kindling 


2. FUEL
The dead wood of holly burns hot and long as a fuel.

A lot of dead wood from holly trees has, for some reason, many small holes running throughout the wood which greatly increases its combustibility (more oxygen). The holes could be the remnant burrows of wood-boring insect larvae.

Many holly trees have large dead limbs still attached to the living tree. These sizable limbs are often vertical, or near vertical, and easy to dislodge (all they often require is a sharp shove to dislodge). The more vertically aligned deadwood is, the drier it usually is (sheds rain better).

Large, dead holly branches can be easily broken into shorter lengths by bashing the dead branches over something hard e.g. a large rock/boulder. No sawing or axe sectioning is generally required. However, be careful when forcefully breaking large branches as they can jar the hands when struck or break upwards – hitting an individual in the face.


3. CARVING WOOD
Dense, smooth and often of clean, ivory-white colour – the wood is exceptionally attractive.

Although the wood can be hard to carve, it holds a hard-wearing edge and is an ideal choice for robust carving projects, be warned – the wood can be prone to splitting at the ends when dried too quickly.

It’s important that holly wood has been dried (seasoned) gradually, especially if you are planning on using the wood for important carving projects, such as a knife handle.


4. FEATHER STICKS
Admittedly, holly is not a first choice wood for feather sticks.

It’s hard to acquire sufficient lengths of holly wood that is knot-free. Also, dead holly tends not to yield long, multiple-curled shavings when carved.

However, it’s possible to make small feather sticks from holly – it’s just that more of them are required to make a large enough mass of curls for a sure-thing fire in damp conditions – anything between 4-8 feather sticks, even more.

How many feather sticks is exactly needed depends on your feather-stick making skills and the quality of the holly wood that you are using (make sure to make plenty of thin splints as well!).

So, why bother making inferior feather sticks from Holly? There are deciduous woodlands that have a vigorous understory of holly with few other tree species present. In those instances, holly can be the best feather stick choice and since bushcraft is very much about expanding our skill sets for all eventualities…

5. FLAMMABLE BARK
Birch is not the only deciduous tree in town that has flammable bark.

Mature holly trees, especially standing, dead holly trees, sometimes shed a peeling bark that is flammable – certainly not as flammable as birch bark, nor does holly bark come off in the same copious quantities as birch bark – but off it comes, and it's flammable – and can give you a fire-lighting edge when you need it.


6. BOW DRILL LUBRICANT
The leaves of holly, when crushed, are fantastically waxy.

Holly leaves make a first-class lubricant for the handheld (bearing block) of the bow drill.

Personally, I admire the way my drill spins in the handhold when lubricated with holly leaves. Makes drilling a lot easier which enables me to spin my drill as fast as possible with less effort.

Seriously, I’ve found holly leaves to be a great bow drill lubricant and so will you?

Occasionally, I will put a few holly leaves in my backpack when the opportunity presents itself – just in case I decide to make a bow-drill fire in a location where holly trees are absent.


7. STRAIGHT, STRONG BRANCHES
Not a whole lot of deciduous tree species naturally produce straight branches.

Of course, some tree species when coppiced, such as hazel and sweet chestnut, produce an abundance of straight branches. Un-coppiced holly is generous in its gift of straight branches.

Strong, long and tough – the straight branches that grow as secondary growth on the larger branches or a basal growth at the bottom of the main tree trunk have multiple, potential uses – shelter construction, throwing sticks, batons, digging sticks, arrows, walking staffs, spring traps and pot suspension are just a few applications for the straight, tough and long branches of holly.

It’s not hard to see why, historically, holly branches were once used for making spears and chariot axles.

Straight and strong branches growing from the base of a holly tree. Holly branches are also quite elastic 

8. SHELTER
An unusual application of holly. The dense, evergreen canopy of holly can provide a discreet, well-sheltered site.

Many holly trees have a canopy that reaches close to or to, the ground. Such trees are great for wildlife observation, or as a sheltered spot for sitting out inclement weather (while getting a quick brew on) or as a discreet camping site.

Just be mindful of the spiny leaf litter of hollies – some form of barrier is required to comfortably sit or lie under a holly tree. Alternatively – clear away the holly leaf litter from under the tree.

Bonus: the thick evergreen canopy of holly tends to disperse campfire smoke very well – important if you want to maintain a low-impact presence in an area.


9. LEAF LAYER OF DEBRIS HUT
The thick, leathery leaves of holly provide great insulation for natural shelters such as the leaf-debris hut and the leaf-debris group shelter.

Rain tends to be shed off more efficiently from a shelter cocooned in holly leaves. Gathering the spiny, holly leaves can be challenging – usually, some form of hand protection is required.

However, where there are holly leaves there are obviously – holly trees, so making a nice, natural shelter under a benevolent holly canopy can provide additional weather-buffing.


The dense canopy of holly trees can provide a surprising amount of shelter

THINK FOR YOURSELF


WHY YOU SHOULD CONDUCT YOUR OWN BUSHCRAFT EXPERIMENTS


The above list of 9 bushcraft uses of holly is certainly not a comprehensive list of all bushcraft uses associated with holly.

It’s my hope that you create your own list of bushcraft uses for the holly tree – through your own bushcraft experiments.

Of course, it’s important to avail of training courses, advice, research and experience as regards progressing your bushcraft knowledge, skills and experience.

It’s also vitally important that you draw your own conclusions from your own observations, deductive reasoning and experiments.

A key asset of any serious bushcrafter that actually spends a lot of time outdoors is fostering your own ingenuity – that you strive to acquire the confidence and get-go attitude to create and improvise for yourself.

Learn to trust your own ideas, and test them (as safely as possible). If they fail, so what? At least you tried and learned something about what works and doesn’t work.

When you succeed you will plant a seed of confidence in yourself to trust your own observations.

This is important.

Books, training courses, other sources of valid bushcraft information etc. will only get you so far.

Wild places are variable at the best of times – they demand a flexible mindset to overcome some of the inevitable challenges that wild places will occasionally throw at you.

This is especially important if you plan on visiting, alone or with a group, wilderness areas. It’s also important in survival scenarios.

Besides, figuring things out for yourself can be surprisingly satisfying – even fun. Whether it's experimenting with unusual bushcraft applications of holly, or modifying a natural shelter design – it's important that you occasionally flex and strengthen your ability to try things differently – on your own terms.

The art of applying competent, safe and novel ideas in a bushcraft setting, is a practice that improves with regular application. I will explore this theme more fully in a future article, so keep tuned . For now, I hope you enjoy becoming (re)acquainted with a fantastic bushcraft tree – holly.


HELP PRESERVE THE HOLLY


Finally, I’m going to briefly step onto my environmental soap box and share a message I think is important.

In many places, there has been a serious decline in female holly trees due to the custom of cutting down berry-laden holly branches for Christmas.

Often there is a disproportionate ratio of male to female holly trees with male trees greatly outnumbering female holly trees because of a local decimation of female holly trees.

If you are considering collecting holly berries, please refrain from doing so. Wild berries serve a much more vital function in nature – certainly more important than human decoration. The true Bushcrafter cares about nature and tries, when possible, to enhance a woodland rather than unnecessarily deplete its natural resources.

As a holly substitute consider the foliage of invasive tree species, such as cherry laurel, Prunus laurocerasus, and rhododendron, Rhododendron ponticum. Although both species lack red berries, the foliage is certainly pretty enough for Christmas wreaths. You will also be helping to control an invasive species.

References:  

(1), (2) & (3):  Trees of Ireland, Native and Naturalized, Nelson, E. Charles and Wendy F. Walsh.


Tuesday, 13 December 2016

Plant Lore: Stinging Nettle

When you find one nettle you often find many others

Stinging Nettle – A Great Gift of Nature
Discover the Many Outdoor uses of Nettle


“Gently touch a nettle and it’ll sting you for your pains
Grasp it as a lad of mettle and soft as silk remains”.

Sean O’Casey, Playwright.


The stinging nettle has a long history of usage by humankind – as far back as prehistoric times.

It’s hardly surprising there is a large body of folklore, as well as traditional uses, associated with the humble nettle.

Widely distributed, generally abundant, a source of medicine and nourishment as well as a source of natural cordage – the stinging nettle is of nature’s great gifts.

A plant well worth befriending…


Nettle Sayings


“Nettle in, Dock out”  – A belief that the leaves of dock plants (Rumex spp.), when crushed, will release a juice that provides relief for nettle stings.

“To Grasp the Nettle” – To force yourself to be brave and do something that is difficult or unpleasant.

To ‘Nettle’ Someone  – To pique, irritate, vex or provoke.

Nettle Facts


Common name:    Stinging Nettle

Identification:     Upright, herbaceous plant with opposite, hairy, heart-shaped, toothed leaves. Green flowers in long, branched clusters springing from axils of leaves. Adapted for wind fertilization.

Scientific name:    Urtica diocea (Genus name, Urtica, is derived from the latin, Uro, to burn)

Alternative names:     Nettle, Greater Nettle, Common Nettle, Burn Weed, Burn Hazel, Burn Nettle.

Irish name:     Neantog (pronounced Neean toag), (Scottish name: Deanntog).

Family group:     Urticaceae (about 500 species worldwide, mostly tropical).

Distribution:     Vast geographical range.

Stinging nettle is a tenacious coloniser of great swathes of the Northern Hemisphere and is abundant throughout Northern Europe, North America and much of Asia.


The fine, stinging hairs of nettle


Nutritional Value:     Exceptional. Vitamin, mineral and protein rich. Most notably high in iron and protein (can be a whopping 25% dry weight).

In short, nettle is a nutritional powerhouse – and well worth adding to your outdoor diet for overall health and well being.


Simple Nettle Recipes:     Both the roots and leaves of nettle are edible.

Nettle Tea: Place 1-2 finely chopped nettle leaves into a cup. Fill cup with boiling water. Allow to steep until cool enough to drink.

Nettle Root Powder: The root, when thoroughly dry, can be sliced thin, then ground into a sprinkling powder and used as a nutritious condiment for outdoor dishes. Can be stored as a long term food.


Medicinal Uses:     Anaemia, constipation, allergies, chest infection, blood tonic…(there are many more).


Outdoor Cosmetic Uses:    because nettle is so nutritious it can be used as a hair tonic. Simply steep a palm-full of chopped nettle leaves in hot water. When water is cool, rinse hair through nettle-infused water. Great for extra lustre and thickness of hair (sadly not a concern for my balding head).


Nettle Cordage:     The tall fibrous stalks of nettles can be processed into an excellent string – certainly strong enough for fishing line and shelter bindings 


Selecting the Best Nettle

The peculiar Habitat Preference of Stinging Nettle


Nettle grows best on fertile, deep, moist soil that is partially shaded.

However, nettle can grow on open, dry soils.

The difference in texture and appearance between nettles that grows in the open and in partial shade is striking.

Nettle that grows on damp, fertile soil generally has leaves that are generally larger, softer and better tasting than the usually dry-textured, smaller leaves of nettle that grow in the open.

Nettles from damp, rich soils are usually taller – making them a good choice for string-making.


Learn 2 Quick Ways to Eat Nettle


1. Eating Raw Nettle

Eating raw nettle is a great, quick way to obtain a filling, nutritious snack to stave off hunger pangs when outdoors.

Who needs shop-purchased snacks when surrounded by a wholesome plant like nettle?

How to Eat Raw Nettle in 5 Easy Steps

1. Gently grasp the under surface of a nettle leaf (most of the stinging hairs are found on the upper surface). If in doubt cover your fingers.

2. Cut the leaf free, by slicing through the leaf stalk.

3. Begin to fold leaf over – from the under surface only.

4. Keep folding and pressing leaf – this action will crush and neutralise the stinging hairs of the upper leaf surface.

5. Make sure all the stinging hairs are crushed by repeatedly folding.

Pop into mouth, chew and enjoy.

Warning: do not select nettle that is frequented by domestic dogs – there is a small chance that domestic dogs will urinate on nettles. If in doubt, select uppermost leaves from tall nettles (that are above dog-pee level, usually 2 feet and above).

2. How to Wilt Nettle in 3 Easy Steps

Wilting nettle leaves over a campfire not only neutralises the stinging hairs but can impart a pleasant, slightly roasted, crunchy texture to nettle leaves.

1. Rub the base of nettle stalk with the back of your knife or with a stick – this action will rupture and neutralise the delicate, toxin-filled, stinging hairs.

2. Cut the nettle free at the smoothed section of the base.

3. While holding the stalk base – pass the leaves over the heat of a campfire – this action will quickly wilt the leaves. Wilt the leaves until the preferred texture is acquired. Be mindful of passing the nettles too close to flames as this can burn the leaves too much. Be thorough – make sure all the stinging hairs of the leaves are neutralised by heat from the fire.

When thoroughly wilted – eat heartily and enjoy.


Top Tip


Dead Nettle Stalks as Tinder & Kindling


Each autumn, wild patches of nettle can be seen wilting, eventually dying.

The dry, hollow stalks of dead nettle make an exceptional tinder or kindling for starting a campfire.

Even during wet weather – cracking open the stalks lengthways – into long-as-possible lengths and exposing the dry interior of these stalks to a flame will greatly increase your chance of igniting a campfire during foul, wet weather.

Even during the colder months of autumn and winter – nettle keeps on giving…


Finishing Thoughts

Next time you are on a wander through a patch of wild land – and you stumble across some nettle – consider taking a break.

Maybe light a small fire, cook up some nettle and relax.

The more wild edibles you can sustainably harvest from different habitats the more connected you will become to these places.

It’s a big part of improving an individual’s bushcraft skills.

It also imparts a sense of belonging to wild places.

There is a large range of skills and knowledge associated with bushcraft. This is a good thing – because a range of bushcraft skills and knowledge is required – when living outdoors on self-propelled excursions with minimal equipment.

But bushcraft is not just about technical mastery.

Bushcraft is also be a means of emotionally connecting with wild places – places that can encourage a sense of gratitude for what nature can often generously provide.

The nutritious, medicinal, utilitarian and generally common stinging nettle is a strong example of what nature can generously provide.


Friday, 25 November 2016

How to Track Wild Animals in the UK

Incessant rain. Muddy ground. Diminishing hours of daylight. With the headlong plunge into inclement weather almost upon us, staying in might seem the only sensible course of action at the moment. But get outside and you can find the traces of a hidden world almost everywhere you look.
The ability to track wild animals – the ultimate huntsman’s hack – is akin to learning a new language. It’s simply a process of familiarising yourself with patterns. Once learned, this endlessly rewarding skill is never forgotten; instead it stays with you, deepening your connection to the landscape and the creatures we share this earth with.

Recent rain and the mud it creates provides a good canvas, especially if you find a stretch of it before any dog walkers arrive. Get up early enough even in the heart of a city and you can find easy-to-follow records. I’ve discovered roe deer slots on Hampstead Heath before, as well as (inexplicably) a single badger print on the edge of a muddy puddle by Regents Canal. But for obvious reasons, rural areas are the most productive, having the highest density of animals and being less disturbed by humans. Head for the intersections between habitats: the field and forest, the forest and stream, the stream and the field.

Areas of loam soil receive clearest impressions. Look for prints around walls, hedges, gateposts and at the edges of woods. Investigate any ‘runs’, paths cut by regular animal use, leading to and from feeding and breeding grounds. Telltale signs are flattened grass, holes pushed through thicker vegetation and clumps of hair trapped in low fencing wire.

The best times to be out are at sunrise and just before sunset, when the height of the sun shows up prints better. Record any you might find so you identify them properly at home. Familiarity is the key to learning this language. Photograph it alongside something that adds scale, such as a coin.

A good starting point in both town and country is to look for the fox. At first you may take them for a dog’s print, but a fox’s will be longer and more slender, 5cm long and 4cm wide. There will also be a separation between the front two pads and the two outer pair; a matchstick placed between them will touch neither. In a dog’s print, it would bisect them all. As winter approaches you may even see the traces of hair pressed in between pads as their coats thicken for the colder months.


A fox's print


Once you have your eye in, it becomes addictive. There is a sense of excitement in following the prints as far as you can, recreating the movements and mindset of wild animals. It’s exactly what our ancestors did when hunting: reading the ground, understanding how prey or predator moved. Nowadays we may be hunting with a camera rather than a spear, but its no less rewarding to lift yourself from the worries and stresses of our human world for an hour or two.

Soon you find yourself on the lookout for other British mammals – the bear-like print of the badger; red, fallow, muntjac and roe deer; squirrels and stoats; wild boar; rabbits and hares. In Wales once, while chancing to look over the bank of a river, I found the clearest imprints of an otter. You could even see where it had stopped and listened to my approach, the point it turned its head recorded an arc of water droplets in the sand.


A fresh otter print


More edgy was a night I spent in a wood in Scotland. Over breakfast the next day the landowner delighted in showing me photographs of big cat prints that he said he’d taken close to where I’d pitched up camp.

Autumn is a time of industry in the outside world so there’s no better time to pick up this language. Have a go at learning some of the prints below and set out to see what you can find.


Saturday, 22 October 2016

10 Tips to Make a Fire in a Tough Situation

ALWAYS BE THINKING ABOUT THE NEED FOR YOUR NEXT FIRE. THIS HELPS US TO BE PREPARED WITH OUR SKILLS AND ABILITY, TOOLS, AND EXPERIENCE TO LIGHT A FIRE EFFICIENTLY WHEN IT COUNTS THE MOST.


When the weather is great and you have all the time in the world, most anyone can light a fire. But when it’s raining or snowing, your hands are shaking, your decision-making abilities are compromised, and the ground is soaked – and you desperately need a fire – it can be a frustrating, difficult, and often impossible chore.

Fire is life. With it, you can dry out wet clothing, keep hypothermia at bay, disinfect water to drink, and provide a psychological boost in a dire situation.

If you ever hope to be able to make a fire in a tough situation, when the chips are down, you need to know how to make a fire the right way.  It’s all well and good that you have the latest piece of gear that can make a spark under water, but if you can’t make a fire from that spark, who cares?  If you can’t nurture an ember into flame and create a sustained fire, you’re dead.

Here are 10 tips that can help you make a fire in a tough situation:


  • Think Fire.  Always be thinking about the need for your next fire.  Sure it might be a beautiful day, but how will you make fire if you have to?  Having a mindset that you will be required to create a fire helps us to be prepared with our skills and ability, tools, and experience to light a fire efficiently when it counts the most.

  • Carry Fire Tools.  To make fire we need an ignition source, fuel, and oxygen. What ways can you easily ignite a fire?  What are the various tools you are carrying that create a flame or spark? A lighter? A ferrocerium rod? Flint and Steel? Have back up tools and carry them with you. I have a small leather pouch that I use as a fire kit. It contains a Flint and Steel, some petroleum jelly soaked cotton balls, and a couple of Sulphur Matches. I also carry a small butane lighter in my pocket.

  • Think Simple.  When visiting South America I was watching a man prepare to start a fire.  I was hoping to learn some ancient Mayan fire-starting technique. Instead he pulls out an ordinary butane lighter. The expression on my face  must have been priceless. ¡Es sencillo! he says. “It’s simple!” He was right. In a survival situation, use the simplest way you have to ignite a fire. A butane lighter with an adjustable flame is a lifesaver.

  • Collect Tinder as You Find it.  Even if you don’t plan on having to light a fire, hiking with a “Think Fire” mindset means that we get in the habit of collecting fine, dry tinder as we hike.  Ideal tinder materials are resin-rich fatwood, birch bark, cedar bark, tinder fungus, Old Man’s Beard tree moss. dried pine resin pieces, cattails, an abandoned bird’s nest, dead branches at the inside base of conifer trees, dry grass, and the like. Carry the tinder in a safe dry place. I use an old leather pouch  with a drawstring closure that has been wax treated. I also drop a few of those silica desiccant packets into the bottom of the sack to reduce moisture further. You can carry the bag tied to your belt or on a lanyard around your neck. If weather is poor, stick the bag under your coat to keep the tinder warm and dry.

  • Protect Your Fire Making.  While you keep your tinder protected under your coat, in a pocket or in a tinder bag, locate the best place to build the fire.  Use a large stand of trees, a rock wall, or the opening of a cave to shelter the fire from wind, driving rain, or snow. Don’t build a fire under tree boughs full of snow – unless you want the fire extinguished by a mini avalanche of snow when you least expect it. If you have a tarp, set it up. It can protect the fire and reflect heat back to you.  Other members of your group could build a shelter from natural materials that could provide protection from the elements.

  • Fire making is more than Producing an Ember.  Producing an ember is not creating a sustainable fire.  Many people practice sparking a piece of cotton with a fire steel, or creating an ember from a primitive hand drill or bow and drill. These are beneficial skills to have.  However you know as well as I do, that catching a spark or creating an ember is only the start.  Don’t neglect the important skills of transferring spark and ember to tinder, nurturing the ember to flame, and then patiently building a sustainable fire.

  • Master the Tinder Bundle.  Take a look at the type of material that a small bird collects to make a nest.  Those are the same kinds and size of materials that we should collect to make a tinder bundle that could receive an ember or spark to create a flame.  Master the art of nest making like a bird. Try different materials to make the tinder bundle or birds nest.  Scrapings from birch bark or cedar or Old Man’s Beard tree moss can be placed in the center of the nest and will most easily welcome that spark or ember.  Once the spark is in the nest, be gentle, have patience, don’t flood the nest with billows of your moist breath in an attempt to have the ember take hold.  Protect the ember like a valuable jewel in the nest, because it is!

  • Build a Hearth. Clear the fire making area from snow and create a fire hearth or platform of dry wood to get the fire up off the wet ground. Take some dry wood, about 18 inches long and an inch or so in diameter and make a “raft” of sorts on the ground that covers a larger area than the size of your expected fire. This helps prevent your dry tinder and other fuel from absorbing moisture from the ground.

  • Prepare Fuel for the Flame.  Collect various size branches from dead standing trees.  If it’s raining or has recently snowed, you’ll find the driest branches at the inside base of conifer trees. Once you have a flame in the tinder bundle, you will need to feed it this dry wood starting from a very small size and increasing in diameter until the fire is sustainable.  Have patience.  Don’t fuss too much with the bundles of fuel.  Let the fire do its thing. Leave the branches 12-24 inches long so you can reposition them around the tinder bundle.

  • Practice, Practice.  When you can consistently find tinder, kindling, and larger fuel in your familiar forest environment, and you are able to start a fire under the best of circumstances, then start applying these techniques to more adverse conditions.  Challenge yourself.  Keep practicing until it’s second nature. Go out hiking in the rain and build a fire. Use only one match. Practice building a fire with very little daylight left, or in the dark.  There’s no telling what sort of difficult situation you might find yourself in and have to build a lifesaving fire.


May a fire always be burning in your heart – and on your hearth.

I hope this post will encourage you to prepare for making fires in tough situations. If you know anyone who might benefit from this post then please share it with friends on Twitter, Facebook, etc.

Thursday, 6 October 2016

How to Make a Simple Healing Plantain Salve


Plantain is one of those magical herbs that can be found almost anywhere. It’s used in many cultures as a “healing herb” due to its amazing healing properties. Most people view this herb as a weed. It’s very prolific and will pretty much grow anywhere. Don’t toss it in the compost just yet! Harvest the leaves to make a first aid healing salve.


How to Identify Plantain


There are two varieties of plantain commonly seen in the average yard: Plantago major, or more commonly known as broadleaf and Plantago lanceolata, also known as narrowleaf. I have mostly narrowleaf in my yard. In fact, I have patches of it growing in my garden. I just leave it and harvest from it when I need it. Both varieties have several leaves which surround the flowers and the stem at the base like flower petals.


Plantago major, rounded leaves.


Plantago lanceolata. Pointed, narrow leaves.


Remember, when harvesting plantain, make sure you are gathering them from an area not treated with chemicals.


Supplies


A handful of Plantain leaves (washed and dried)
½ oz Beeswax (pellets or shaved)
8 oz Heatproof jar (not shown)
Saucepan (not shown)


Directions

Add Plantain to the Jar


Tear the plantain leaves into smaller pieces and fill the jar half full. Pack the leaves in there tightly.


Add Coconut Oil


Add the coconut oil on top of the leaves. Put the jar in a saucepan and fill the pan about halfway up the jar with water. Set the heat on a low simmer and let the oil infuse for about two hours.

Strain


After the oil infuses for a couple of hours, strain out the plantain leaves. The oil will be a pretty light green.

Add the beeswax


Add the beeswax to the infused oil and put in back into the saucepan until the beeswax melts. The beeswax will help keep the salve firm at room temperature.

Pour into Jars or Tins


Pour the oil mixture into tins or jars—my batch made 6 oz. Let the salve cool. It will become opaque as it cools.

Add to Your First Aid Kit


Use the salve on minor cuts and burns. The coconut oil and beeswax will help keep the skin moist and the plantain will promote healing. The salve is also great for healing chapped hands and sunburned skin. Use the salve on your pets too! It’s great on sore paws.

Plantain is also great for bee and wasp stings, mosquito bites, poison ivy, eczema, psoriasis and nappy rash.